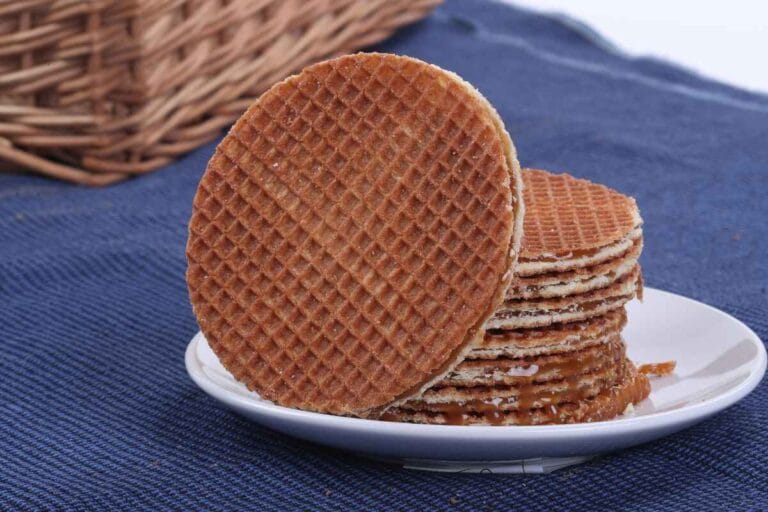
Wafer cookies are a timeless treat loved by many for their crispy texture and subtle sweetness. Whether you’re planning to enjoy them plain, pair them with coffee, or use them in creative desserts, knowing how to make these cookies from scratch is a skill worth learning. This guide will walk you through everything you need to know to make wafer cookies at home, troubleshoot common problems, and even use them in exciting recipes.
Table of Contents
What Are They?
These thin, light, and crispy treats melt in your mouth with every bite. Unlike heavier cookies, they are delicate and often layered or filled with delicious flavors.
A Brief History
The origins of these crispy delights date back to medieval Europe, where similar thin snacks were made using heated irons. Over the years, they became more refined, transforming into the structured treats we enjoy today. Now, they’re a staple in bakeries worldwide, available in a variety of flavors and styles.
Why Are They So Popular?
The charm of these treats lies in their versatility. They pair perfectly with coffee, tea, or ice cream and work as a base for countless desserts. Their light texture makes them a guilt-free snack, and their ability to adapt to both sweet and savory flavors ensures there’s a variation for everyone to love.
Ingredients Needed to Make Wafer Cookies
Before diving into the process, let’s gather the ingredients. These simple items come together to create the perfect batch of crispy wafers.
Basic Ingredients
| Ingredient | Quantity |
|---|---|
| All-purpose flour | 1 cup |
| Powdered sugar | ¾ cup |
| Unsalted butter | ½ cup (melted) |
| Milk | ½ cup |
| Vanilla extract | 1 tsp |
| Baking powder | 1 tsp |
Optional Add-Ins for Flavor Variety
Want to switch it up? Try adding these for extra flavor:
- Cocoa powder: For a chocolate twist.
- Almond extract: For a nutty aroma.
- Matcha powder: For a green tea-inspired version.
“Baking is like art—every ingredient is a brushstroke, and wafers are your masterpiece!” 🍪

Step-by-Step Guide on How to Make Wafer Cookies
Making wafer cookies is easier than it looks. Follow these steps to create perfect wafers every time.
Preparing the Batter
- Mix Dry Ingredients: In a bowl, combine the flour, powdered sugar, and baking powder.
- Mix Wet Ingredients: In another bowl, whisk together the melted butter, milk, and vanilla extract.
- Combine: Slowly pour the wet ingredients into the dry mixture, stirring until smooth. The batter should be thin and pourable.
Cooking Wafer Cookies: Tips for Perfection
- Preheat Your Waffle or Wafer Iron: Lightly grease it with butter or a non-stick spray.
- Cook the Wafers: Pour a small amount of batter onto the iron and spread it thinly. Close the lid and cook for 1–2 minutes or until golden brown.
- Remove and Cool: Use a spatula to transfer the wafer to a cooling rack. Repeat with the remaining batter.
“The secret to perfect wafers? Patience, a hot iron, and a gentle touch.”
Cooling and Storing Your Wafer Cookies
Let the wafers cool completely before stacking them. Store them in an airtight container to keep them crispy for days.
Essential Tools and Equipment for Wafer Cookies
To get started, you’ll need a few tools that make the process easier.
Must-Have Tools for Thin, Crispy Wafers
- Waffle or Wafer Iron: For even cooking and a traditional texture.
- Cooling Rack: To help wafers cool evenly without becoming soggy.
- Spatula: For carefully removing the delicate cookies from the iron.
Substitutions for Common Equipment
No waffle iron? No problem! You can use:
- A baking sheet: Spread the batter thinly and bake at 375°F (190°C) for 7–10 minutes.
- A griddle pan: Cook the batter on low heat, flipping for an even finish.
Common Problems When Making Them
Even experienced bakers can face challenges when creating these delicate treats. Here’s how to solve some common issues:
Why Do They Lose Their Crispness?
- The Problem: Exposure to humidity or improper storage.
- The Fix: Keep them in an airtight container, and add a silica packet to absorb moisture.
How to Prevent Them from Sticking
- The Problem: Not greasing the iron properly or using uneven batter.
- The Fix: Lightly grease the iron before each batch and spread the batter evenly for smooth results.
“A little care ensures your treats come out perfect every time!” 😊
Creative Ways to Use Wafer Cookies
Wafer cookies are more than just a snack—they’re a versatile ingredient in many recipes.
Wafer Cookies in Desserts
- Layered Cakes: Use wafers as layers between whipped cream or mousse for a no-bake treat.
- Parfaits: Crumble wafers into a glass with yogurt and fruit for a quick dessert.
- Chocolate-Dipped Wafers: Coat wafers in melted chocolate for an indulgent snack.
For even more ideas, check out this guide on wafer cookies that everyone will love.
Variations of Wafer Cookie Recipes
While the classic wafer cookie is always a crowd-pleaser, there are plenty of ways to mix things up. Whether you’re craving chocolate, vanilla, or something healthier, here are some fun variations to try.
Chocolate Wafer Cookies
Chocolate lovers rejoice! These rich, crispy wafers are perfect on their own or paired with a creamy filling.
Ingredients:
- Add 2 tablespoons of cocoa powder to the classic batter.
- Increase the sugar slightly for extra sweetness if desired.
Tips:
- Use dark cocoa powder for a bolder flavor.
- Pair chocolate wafers with vanilla ice cream for a simple yet decadent treat.
Vanilla Wafer Cookies
For a more traditional flavor, vanilla wafer cookies never fail to satisfy.
Ingredients:
- Replace regular vanilla extract with Madagascar or Tahitian vanilla for a more intense flavor.
Tips:
- Top freshly cooked wafers with a light sprinkle of powdered sugar for an elegant finish.
- Layer these cookies with fruit and whipped cream for a refreshing dessert.
Gluten-Free and Vegan Wafer Cookies
Want to make a version everyone can enjoy? Here’s how to make gluten-free or vegan wafers:
Gluten-Free:
- Substitute all-purpose flour with almond flour or a gluten-free flour blend.
- Reduce liquid slightly to maintain the right batter consistency.
Vegan:
- Replace butter with coconut oil or vegan butter.
- Use almond or oat milk instead of dairy milk.
“With a few tweaks, everyone can enjoy the crisp, delicious magic of wafer cookies!”
Storing Wafer Cookies Properly
Keeping wafer cookies fresh and crisp requires the right storage techniques. Follow these steps to ensure your cookies stay perfect for as long as possible.
How to Keep Wafer Cookies Fresh and Crisp
- Store in an airtight container to protect against moisture.
- Place a piece of parchment paper between layers to prevent sticking.
- Keep in a cool, dry place, away from humidity or direct sunlight.
Freezing Wafer Cookies for Longer Storage
Freezing is a great way to extend the life of your wafer cookies without losing flavor or texture.
Steps to Freeze Wafer Cookies:
- Arrange the wafers in a single layer in a freezer-safe container.
- Add parchment paper between layers to prevent sticking.
- Freeze for up to 3 months.
Thawing Instructions:
Remove from the freezer and let them sit at room temperature for 10–15 minutes before serving.
“Proper storage means you can enjoy your homemade wafers anytime, without worrying about them losing their crunch!”

Nutritional Information About Wafer Cookies
Wondering how wafer cookies fit into your diet? Here’s a general breakdown of their nutrition per serving (about 3 cookies):
| Nutrient | Amount |
|---|---|
| Calories | ~110 kcal |
| Total Fat | 4g |
| Carbohydrates | 15g |
| Protein | 1g |
| Sugar | 8g |
Healthier Alternatives for Wafer Cookie Recipes
Looking to lighten things up? Here are a few ideas:
- Replace sugar with natural sweeteners like honey or stevia.
- Use whole wheat or oat flour for added fiber and nutrients.
- Reduce butter by substituting with unsweetened applesauce or yogurt.
“Healthy wafers don’t have to compromise on flavor—they can still be crisp, sweet, and oh-so satisfying!”
Frequently Asked Questions About Wafer Cookies
Have questions about making or storing these crispy treats? Here are some quick answers:
Can They Be Made Without a Wafer Iron?
Yes! Spread the batter thinly on a parchment-lined baking sheet and bake at 375°F (190°C) for 7–10 minutes until golden brown.
How Long Do They Stay Fresh?
When stored in an airtight container, they can stay fresh and crisp for up to 2 weeks.
Are They Gluten-Free?
Traditional recipes use wheat flour, but there are gluten-free versions made with almond flour, rice flour, or other substitutes.
“No matter your question, there’s always a way to make wafer cookies work for you!”
Tips for Perfect Wafer Cookies Every Time
Making wafer cookies at home is simple, but a few tips can take them from good to absolutely perfect. Here’s how to ensure your cookies turn out crisp, golden, and delicious every single time.
Achieving the Perfect Crisp Texture
- Spread the Batter Thinly: The thinner the batter, the crispier the wafer. Use a spatula or the back of a spoon to spread it evenly.
- Preheat Your Wafer Iron: Make sure the iron is fully heated before adding batter to cook it evenly.
- Cool Completely: Let the wafers cool on a wire rack to help them firm up and stay crunchy.
Balancing Flavors in Wafer Cookies
- Don’t Overdo Sweeteners: Wafer cookies are meant to be subtle, so don’t add too much sugar.
- Pair with Bold Fillings: Use rich fillings like dark chocolate, fruit jams, or nut butter to complement the mild cookie base.
- Experiment with Extracts: A few drops of almond, orange, or coconut extract can add unique flavors without overpowering the cookie.
“The magic of wafer cookies lies in their simplicity—small adjustments make a big difference!”
Creative Uses for Wafer Cookies
These crispy treats are incredibly versatile and can enhance a wide variety of desserts and snacks. From adding texture to creating show-stopping presentations, here are some fun and creative ways to use them:
Ice Cream Sandwiches
Transform these light cookies into irresistible ice cream sandwiches! Simply layer a scoop of your favorite ice cream between two wafers, then press gently. For extra flair, roll the edges in sprinkles, crushed nuts, mini chocolate chips, or shredded coconut. Freeze them for 20 minutes to firm up before serving.
Crushed Wafers in Baking
Crushing wafers opens up a world of dessert possibilities:
- Pie Crust: Blend crushed wafers with melted butter and press into a pie dish for a flavorful, no-bake crust. Perfect for cheesecakes or tarts!
- Toppings: Sprinkle crushed wafers over ice cream, yogurt, or milkshakes to add a satisfying crunch and sweetness.
- Layered Desserts: Use crushed wafers as a crunchy layer in trifles, parfaits, or mousse desserts for added texture and flavor.
Other Creative Ideas
- Cake Decorations: Crush them finely and dust over frosted cakes or cupcakes for a decorative finish.
- Snack Mix: Toss broken wafers with pretzels, nuts, and chocolate chips for a sweet-and-salty mix.
“Whether crushed, layered, or dipped, these treats add a touch of magic to any dessert!” 🍪
Conclusion: Enjoy These Crispy Treats at Home
These light, delicate cookies are more than just a snack—they’re a blank canvas for endless creativity. Whether you bake them from scratch or use store-bought options, they provide countless ways to experiment with flavors and presentation.
Making them at home gives you the chance to customize ingredients, create healthier versions, and enjoy the freshest, crispiest results. Plus, their versatility means you can layer them with cream, crush them for desserts, or simply savor them on their own.
So why not give it a try? Grab your ingredients, heat up the iron, and start crafting these delicious creations today. No matter how you enjoy them, they’re sure to add a little extra joy to your day! 😊

