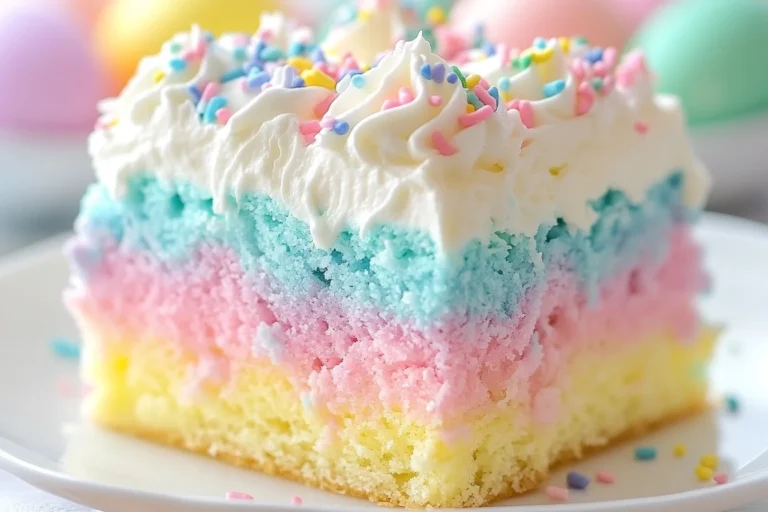
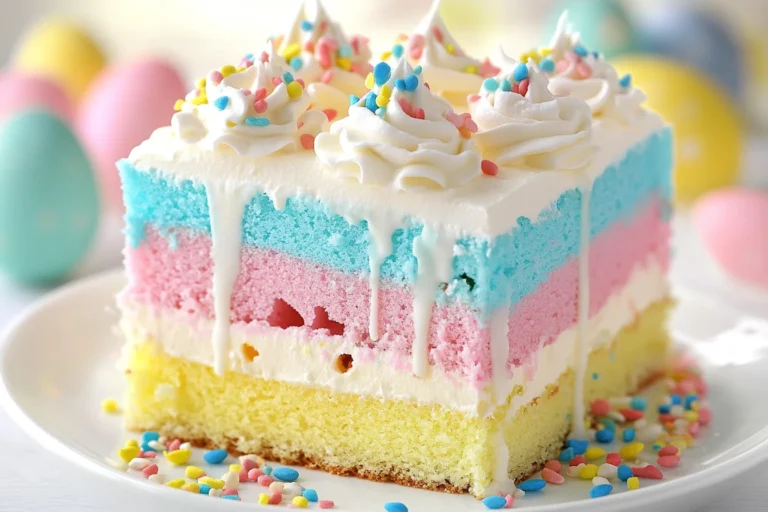
Easter is the perfect time for colorful, festive treats, and this Easter Bunny Poke Cake is guaranteed to steal the show! With its vibrant pastel swirls, creamy pudding filling, and fluffy whipped topping, this cake is as fun to make as it is to eat. Inspired by cherished family traditions, this delightful dessert will add a touch of magic to your Easter table.
Table of Contents
Why You’ll Love This Recipe
- Visually Stunning – The pastel swirls and festive decorations make this cake a showstopper.
- Easy to Prepare – Using a boxed cake mix makes it beginner-friendly while still looking impressive.
- Moist and Flavorful – The pudding filling ensures every bite is rich and delicious.
- Customizable – Easily switch up the colors, pudding flavors, or decorations.
- Kid-Friendly – A great baking project for little helpers who love mixing colors and adding sprinkles!
Ingredients You’ll Need
For the Cake:
- 1 box white cake mix (plus ingredients listed on the box: typically eggs, oil, and water)
- Food coloring gels in pastel shades (pink, blue, yellow)
For the Pudding Layer:
- 1 package (3 oz) instant vanilla pudding mix
- 1¾ cups cold milk
For the Topping:
- 1 container (8 oz) whipped topping (e.g., Cool Whip), thawed
- 1 cup white chocolate chips, melted
- Pastel sprinkles for decoration
- Marshmallow bunny Peeps and mini chocolate eggs (optional, for garnish)
Step-by-Step Instructions
1. Prepare the Cake Batter
Preheat your oven to 350°F (175°C). Grease a 9×13-inch baking dish and set aside. Prepare the cake batter according to the package instructions. Divide it evenly into three separate bowls, then add a few drops of food coloring to each bowl to create pastel shades. Mix well.
2. Layer and Swirl the Batter
Drop spoonfuls of each colored batter into the prepared baking dish, alternating colors. Gently swirl with a toothpick or knife to create a marbled effect.
3. Bake the Cake
Bake for 30-35 minutes or until a toothpick inserted into the center comes out clean. Let the cake cool for 10 minutes.
4. Poke and Fill with Pudding
While warm, use the handle of a wooden spoon to poke holes evenly across the cake. Whisk the pudding mix and cold milk until slightly thickened, then pour over the cake, ensuring it fills the holes.
5. Chill and Set
Refrigerate for at least 2 hours to allow the pudding to set and flavors to meld.
6. Add Whipped Topping and Decorate
Spread the whipped topping evenly over the cake. Drizzle melted white chocolate and decorate with sprinkles, Peeps, and mini eggs.
More Easter Recipes to Try
Looking for more festive Easter treats? Check out these delicious recipes:
- 🥕 Easter Dirt Cake Casserole – A fun and creamy layered dessert featuring crushed cookies, pudding, and festive decorations.
- 🥤 Easter Bunny Punch – A refreshing and colorful holiday drink perfect for kids and adults alike.
- 🍲 Cowboy Stew – A hearty, comforting dish that’s great for feeding a crowd after Easter festivities.
For additional baking tips and inspiration, check out Food Network for expert advice on creating the perfect holiday desserts!
Serving and Storage Tips
- Serving – Slice into squares and serve chilled. Pairs perfectly with tea or milk.
- Storage – Keep in an airtight container in the fridge for up to 3 days.
- Freezing – Freeze the undecorated cake for up to 2 months. Thaw in the fridge before adding toppings.
Helpful Notes
- Alternative Pudding Flavors – Try white chocolate or lemon pudding for a unique twist.
- Homemade Whipped Cream – Whip 1½ cups cold heavy cream with ¼ cup powdered sugar and 1 tsp vanilla extract until stiff peaks form.
- Extra Decoration Ideas – Add edible glitter, crushed candy, or tinted shredded coconut.
Frequently Asked Questions
Can I use homemade cake batter instead of a box mix?
Yes! Just ensure it has a similar consistency to boxed cake batter for best results.
Why did my cake turn out dry?
Overbaking is the most common culprit. Start checking for doneness a few minutes before the recommended time.
Can I make this cake ahead of time?
Yes! It actually tastes better when made a day ahead, allowing the pudding to soak in fully.
What other toppings can I use?
Crushed cookies, toasted coconut, or fresh berries make great additions!
How do I make this cake gluten-free?
Use a gluten-free cake mix and ensure the pudding mix is also gluten-free.
Final Thoughts
This Easter Bunny Poke Cake is a delightful, colorful treat that’s sure to bring smiles to your Easter gathering. With its pastel swirls, creamy pudding filling, and festive decorations, it’s a must-make holiday dessert. Try it out and let me know how it turns out—happy Easter baking! 🐰🎂✨
Print
Easter Bunny Poke Cake
Nothing says Easter quite like a colorful, fun dessert, and this Easter Bunny Poke Cake is just the treat you need! With a moist cake, creamy pudding filling, and a fluffy whipped topping, this dessert is both visually stunning and incredibly delicious. Whether you’re hosting a family gathering or just want a festive treat, this cake will be a delightful addition to your holiday table.
- Total Time: 2 hours 50 minutes (including chilling)
- Yield: 12 servings 1x
Ingredients
For the Cake:
- 1 box white cake mix (plus ingredients listed on the box: eggs, oil, and water)
- Food coloring gels in pastel shades (pink, blue, yellow, purple)
For the Pudding Layer:
- 1 package (3 oz) instant white chocolate or vanilla pudding mix
- 1¾ cups cold milk
For the Topping:
- 1 container (8 oz) whipped topping (e.g., Cool Whip), thawed
- ½ cup white chocolate chips, melted
- Pastel sprinkles for decoration
- Marshmallow bunny Peeps, mini chocolate eggs, and jelly beans (optional, for garnish)
Instructions
Preheat oven to 350°F (175°C). Grease a 9×13-inch baking dish. Prepare cake batter according to package instructions. Divide batter evenly into four bowls and tint each with food coloring to achieve pastel shades.
Drop spoonfuls of each colored batter into the baking dish, alternating colors. Use a toothpick to gently swirl them together for a marbled effect.
Bake for 30-35 minutes, or until a toothpick inserted into the center comes out clean. Let the cake cool for 10 minutes.
Use the handle of a wooden spoon to poke holes evenly across the cake. In a bowl, whisk together pudding mix and cold milk until slightly thickened. Pour over the cake, ensuring the pudding fills the holes evenly.
Refrigerate for at least 2 hours to allow the pudding to set and soak into the cake for ultimate moisture.
Spread the whipped topping evenly over the cake. Drizzle with melted white chocolate and add pastel sprinkles, Peeps, mini eggs, and jelly beans for an extra festive touch.
Notes
- Alternate Flavors – Swap vanilla pudding for lemon or cheesecake pudding for a unique twist.
- Homemade Whipped Topping – Whip 1½ cups cold heavy cream with ¼ cup powdered sugar until stiff peaks form.
- Extra Decorations – Try shredded coconut tinted green for a “grass” effect or edible glitter for sparkle.
- Prep Time: 15 minutes
- Cook Time: 35 minutes
- Category: Dessert
- Method: Baking
- Cuisine: American
- Diet: Vegetarian
Nutrition
- Serving Size: 1 slice
- Calories: 330
- Sugar: 39g
- Sodium: 220mg
- Fat: 15g
- Saturated Fat: 9g
- Unsaturated Fat: 4g
- Trans Fat: 0g
- Carbohydrates: 46g
- Fiber: 0g
- Protein: 4g
- Cholesterol: 35mg

